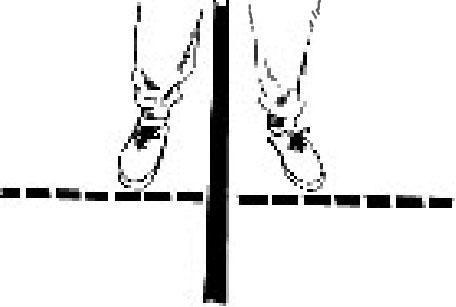
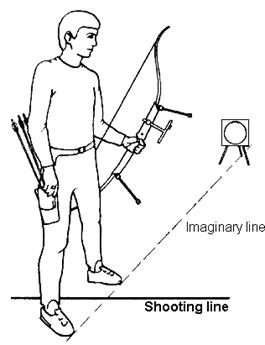
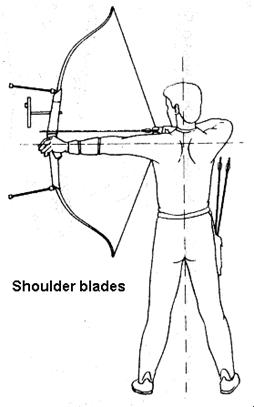
Right handed archers hold the bow with the left hand, so with your left side toward the target, stand at a right angle to the target, with the tips of your toes against an imaginary line pointing at the center of the target. Your feet should be shoulder's width apart, stradling the shooting line.
Stand straight & tall, balanced, with ribs down, shoulders down and relaxed.Shoulders square to the target
Try and relax.
2.Nock (Finger & Hand placement)
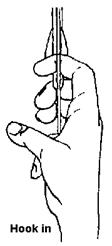
3.Hook String and place bowhand:
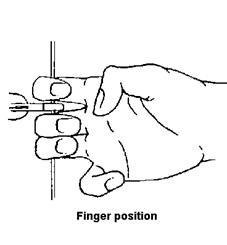
Place your fingers in such a way, that you "hook" the string with your index finger above the nock, and middle and ring finger under the nock
Do not use little finger.
(Shown without finger tab for better illustration)
Hook the string at the first groove. Make sure to maintain a deep hook
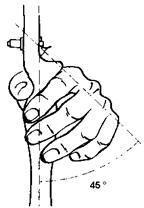
Set your bowhand on the grip on the inside of your life line, on the meaty part of your thumb. Thumb points toward target.
Nock arrow UNDER the nocking point on the string. Listen for the sound of a "snap" as arrow connects to the string.
Index feather (odd color fletching) AWAY from the bow
Relax your fingers. The back of your hand should make an angle of 45 degrees.
The tips of thumb and index finger may touch each other in a relaxed way.
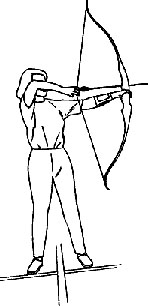
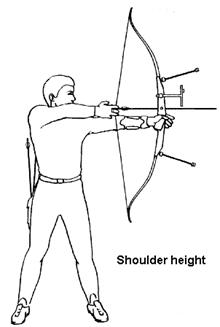
Bring the bow arm to shoulder height -keep shoulders DOWN
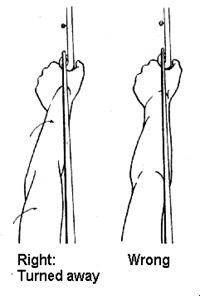
4.Set up(Extending the bow arm)
The elbow of the bow arm is turned away from the string
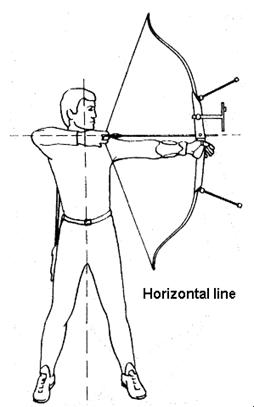
5.Drawing the bow
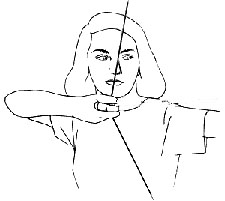
Draw the string along the bowarm in a straight horizontal line to the anchor point on your face.
Draw with your back muscles, moving the shoulder blades towards each other.
Stand straight up and relaxed
Keep both shoulders as low as possible.
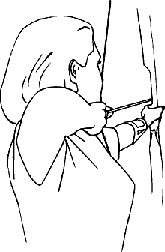
6.Anchoring
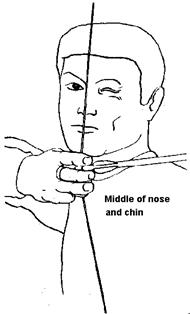
If using a sight, the string should touch the chin and the nose.
The index finger is curled under the jaw bone, the thumb is NOT used as a reference anchor point.
Keep your teeth together. (no gum, remove hats as well)
Bow hand, draw hand and Elbow should form a straight line.
Keep both shoulders as low as possible
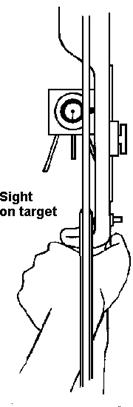
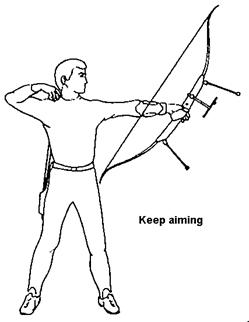
8.Aim
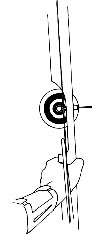
Aim at full draw, by settling the sight ring onto the target. Maintain the connection of drawing hand to the face.
You should see the string line up on the top bow limb exactly at the same place each time and appear a little right of the sight ring.
If you are cross dominant- (right handed, left eye dominant or vice-versa) you must shut the other eye.
Keep the sight at the target
"String picture" : the string lines up on the top bow limb and sight EXACTLY at the same place each time.
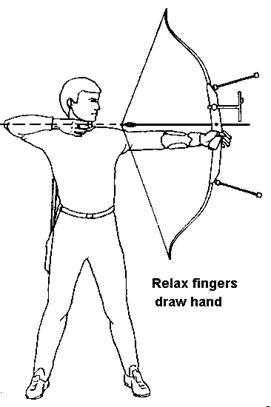
9.Release,
Keep pulling the shoulder blades towards each other, while relaxing the fingers of the draw hand
Your relaxed bow hand will let the bow drop.
You will feel your sling tug gently against your hand, letting you know the sling is catching the bow.
Do not move until you see or hear the arrow hit target ("RELEASE 2.3.4") for best accuracy.
10.Follow Through
7.Load transfer, then Hold
At full draw, transfer the weight of the bow from your arms to your back.
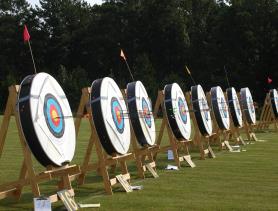
Basic Steps to Archery:
(9 steps to the 10 ring was revised 2007 due to Biomechanically.Efficent.ShootingTechnique method from the Olympic Training Center, known as the National Trainng System.
Basic instructions below for right hand archers (reverse if left handed) using recurve equipment with a sight, and basic safety equipment: sling, finger tab, arm guard.
These videos demonstrate very advanced form, and is an excellent example of the National Training System (NTS). method. also go to http://www.kslinternationalarchery.com/